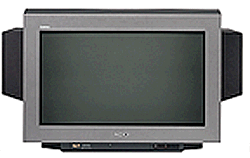
Sony KV-32 FD1E
In mid-1998 I was finally tired of watching TV with my '92 Funai VCR
and my Amiga 1084 Monitor. I had a look on the
KV-32 FD1E
since I
first saw it at the end of 1997, so I bought it. For quite some time
I couldn't imagine a better TV picture, but that changed in late 1999,
when I added a DVD player to my home AV.
The problem
Of course I connected the
(codefree/MV off modified)
Pioneer DV-525
to my TV ASAP using RGB - and was badly surprised. The TV showed
shadows and similar leftovers from high contrast elements of the
DVD players setup menu whenever they were faded out, one could even
identify individual pixels. If you never noticed that this TV has a
framebuffer before, now you would. I made some interesting observations:
- The effect was worst when using RGB in
- It was not that visible when using S-Video (Y/C) in
- It was almost invisible when coming in via Composite. One could
actually see how the patterns where disappearing within half a
second or such, it looked as if they where washed away by the
noise of the Composite input. Weird.
Now that was silly: RGB clearly showed the best picture (rat sharp
so to say), but the framebuffer artifacts made it almost unusable
for DVD viewing. I also noticed that I already knew these artifacts
from my RGB-connected PSX, however I attributed them to the PSX (beeing
a cheap toy), not to the TV. The artifacts are most visible when
counter-color contrasts move on each other or on certain patterns:
- Princess Atas orange dot on the forehead in the bloopers of
A Bugs Life
- The orange hair of that girl in Dino Crisis when
walking by certain walls
However, If you saw that patterns once, you start to see them everywhere.
It just sucks.
The Quest
Of course, I tried the obvious solution everyone with a 100Hz TV would
try: Switch Noise Reduction OFF. It was clearly visible that the effect
was even worse when NR was ON, but silly enough, it did NOT disappear
when switching it off. I tried certain other parameters to no avail.
I finally stepped back to S-Video as it seemed the best compromise
between video signal quality and framebuffer artifacts.
The Holy Grail
As always, solutions come all of a sudden. When I was surfing the
service menu of my TV lately I stumbled over the right knob just by
chance. I used the menu before (I even got circuit schematics as well
as a short description of the service mode 2 (TT--) together with
my TV), but never hit that screw.
It appears that the FD1 actually has four levels of noise reduction:
- 0 - NR OFF
- 1 - minimum NR
- 2 - normal NR
- 3 - maximum NR
The bad news is, it further appears that the menu selection NR OFF
is not linked to level 0, but indeed to level 1. So if you switch
the NR "off" you still have some level of NR and that is all what
causes the artifacts.
The Solution...
... is to switch on NR. Indeed, you hear right. In the normal user
menu, you switch NR ON. But before doing that, you go to the service
menu, submenu Feature Box, item "24 - noise red.". This item seems to
specify the level of NR that applies when NR is set to ON - and you
enter 0 here. Thats all - bye, bye, framebuffer artifacts.
Another tip
When you are in the service mode 2, there is another setting that
dares to change. For some silly (marketing) reason, the FD1 always
uses "Smart" zoom whenever a 4:3 signal is not specified as such by
explicit WSS signaling, in other words, almost always. It would be much
better if the TV used 4:3 in such cases. You cannot change this behavior
with the normal menus, but you easily can in the service mode: Go to
Init TV, find the setting "SMART MODE DEFAULT" and set it OFF. Voila.
What about this service mode 2 thingy?
DISCLAIMER
Service mode 2 is a means for the TV technician to control almost all
aspects of the digital inner life of your TV. It is hidden from the
consumer because it is not secured against wrong input. A lot of
the settings should only be changed with some measurement equipment
attached to the electronics. You can easily misconfigure your TV
in a way that only a technician can fix it, or maybe even only the
manufacturer. If you change a setting, write down the original value.
Don't change settings if you don't even remotely feel to understand
what they mean. Don't expect a technician to fix the TV for free if
you hosed it.
Ok, enough kiddies don't do that at home stuff, if you can stand the
freedom of doing as you see fit, you enter the service mode 2 by:
- Switch your TV to standby using the RCU
- Open the front panel to expose the P+ and P- buttons on the TV
- Press both of them and keep them pressed while the TV comes up
- You see TT-- in the upper right corner. You are now in service
mode 2. Do never enter a number here without knowing what it means.
Numbers call certain menu items or other setup routines immediately,
most noticably, TT49 will do a complete NVRAM RESET. This will
certainly kill your TV to an amount that is beyond home fixability.
- Press the menu button. This is just the good old menu you
already know.
- Press the menu button again. Now you are in the service mode
main menu. Welcome.
Leadout
If you have other interesting tips regarding the FD1 service menu,
maybe even the location where one could configure the NR level to
be used when NR is set to OFF, or how to solve a slight color failure
(my CRT tends to emphasize blue on the left half and red on the right)
I'd be glad to hear of it. I'm also interested in the real quality one
might gain by feeding the FD1 with a progressive scan signal via the
VGA connector (I neither have a HTPC nor are progressive scan standalone
players available in Europe).
Andre Beck
Last modified: Mon Jul 10 11:30:20 MET DST 2000